간단한 인사말 메시지 만들기
시작하기 전에
인사말 메시지를 작성하기 전에 인사말 메시지에서 전달하려는 내용과 어조에 대한 명확한 아이디어가 있는지 확인하세요. 또한 인사말 메시지 작업 영역의 모든 구성 요소를 완전히 이해해야 합니다.
인사말 메시지의 작업 영역에는 두 가지 유형의 구성 요소가 있습니다.
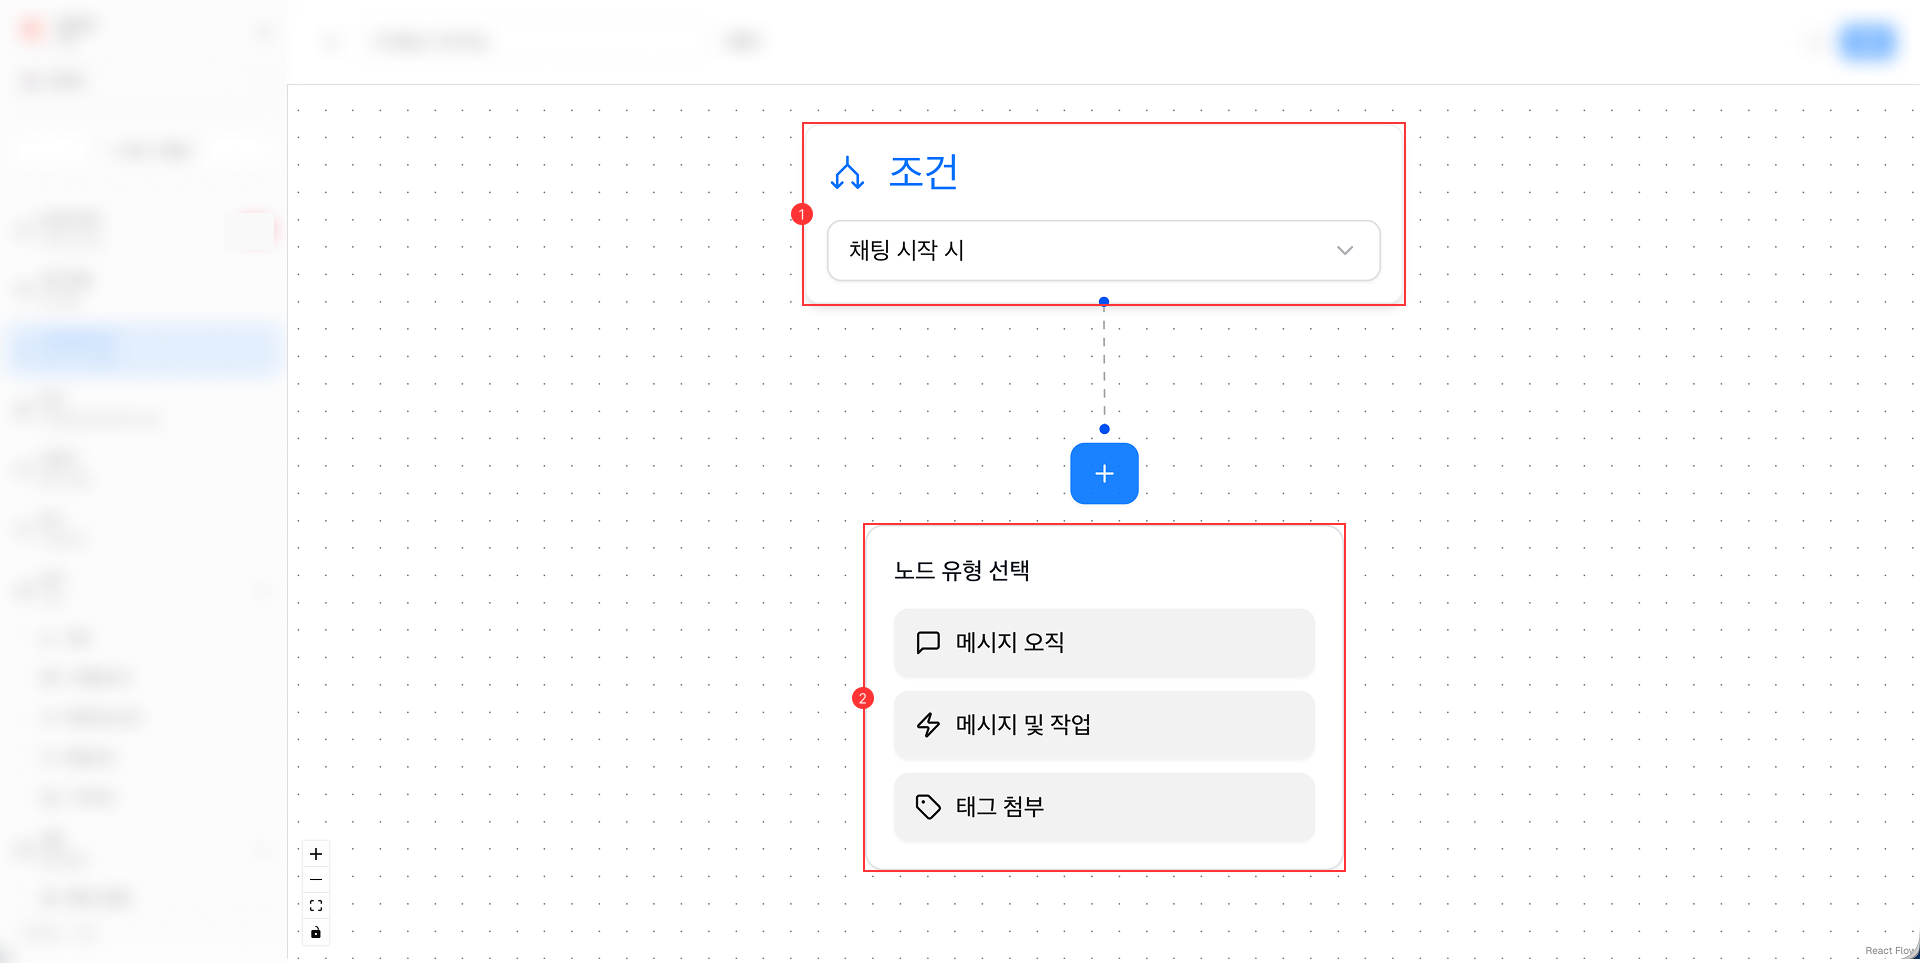
- 조건: 이 구성 요소는 인사말 메시지가 환자에게 전송되는 시기를 결정하는 기준을 정의합니다. 인사말 메시지에는 한 번만 사용할 수 있습니다. 포함:
-
채팅이 시작되었을 때
-
채팅 종료 시
-
영업시간 외 채팅 시
- 노드: 환자에게 보내는 인사말 메시지의 실제 내용을 나타내는 구성요소입니다. 인사말 메시지에 여러 번 사용할 수 있습니다. 포함:
-
메시지: 서식이 지정된 텍스트, 이미지 및 기타 미디어를 포함할 수 있는 텍스트 기반 메시지입니다.
-
메시지 및 작업: 환자가 응답하거나 특정 작업을 수행할 수 있는 대화형 버튼이 포함된 메시지입니다.
-
태그 첨부: MChat이 미리 정의된 태그를 채팅 세션에 자동으로 첨부할 수 있게 해주는 구성 요소입니다.
가정
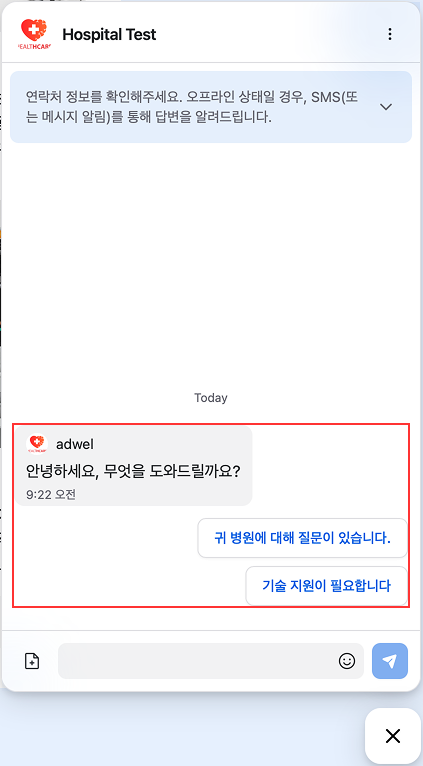
환자가 채팅 세션을 시작할 때 환자에게 전송될 인사말 메시지를 만들고 싶다고 가정해 보겠습니다. 인사말 메시지는 다음과 같습니다.
- 먼저 "안녕하세요. 무엇을 도와드릴까요?"라는 환영 메시지를 보냅니다.
- 그리고 2가지 작업을 제공합니다:
- 액션 A: "귀하의 병원에 대해 질문이 있습니다"
- 조치 B: "기술 지원이 필요합니다"
- 환자가 클릭한 경우:
- 작업 A → "신규 환자" 태그 첨부 → "예약 ID를 입력하세요."라는 메시지가 표시됩니다.
- Action B → "현재 직면하고 있는 기술적인 문제를 설명해 주세요."라는 메시지가 표시됩니다.
인사말 메시지 만들기
1단계: 인사말 메시지 관리 인터페이스 열기 → 새 메시지 생성 버튼을 클릭하여 인사말 메시지 작성기 인터페이스를 엽니다.
2단계: 인사말 메시지 작성기 인터페이스에서. 인사말 메시지의 이름을 "Simple Messages"로 지정했습니다. 그런 다음 저장 버튼을 클릭하여 인사말 메시지를 작성하세요.
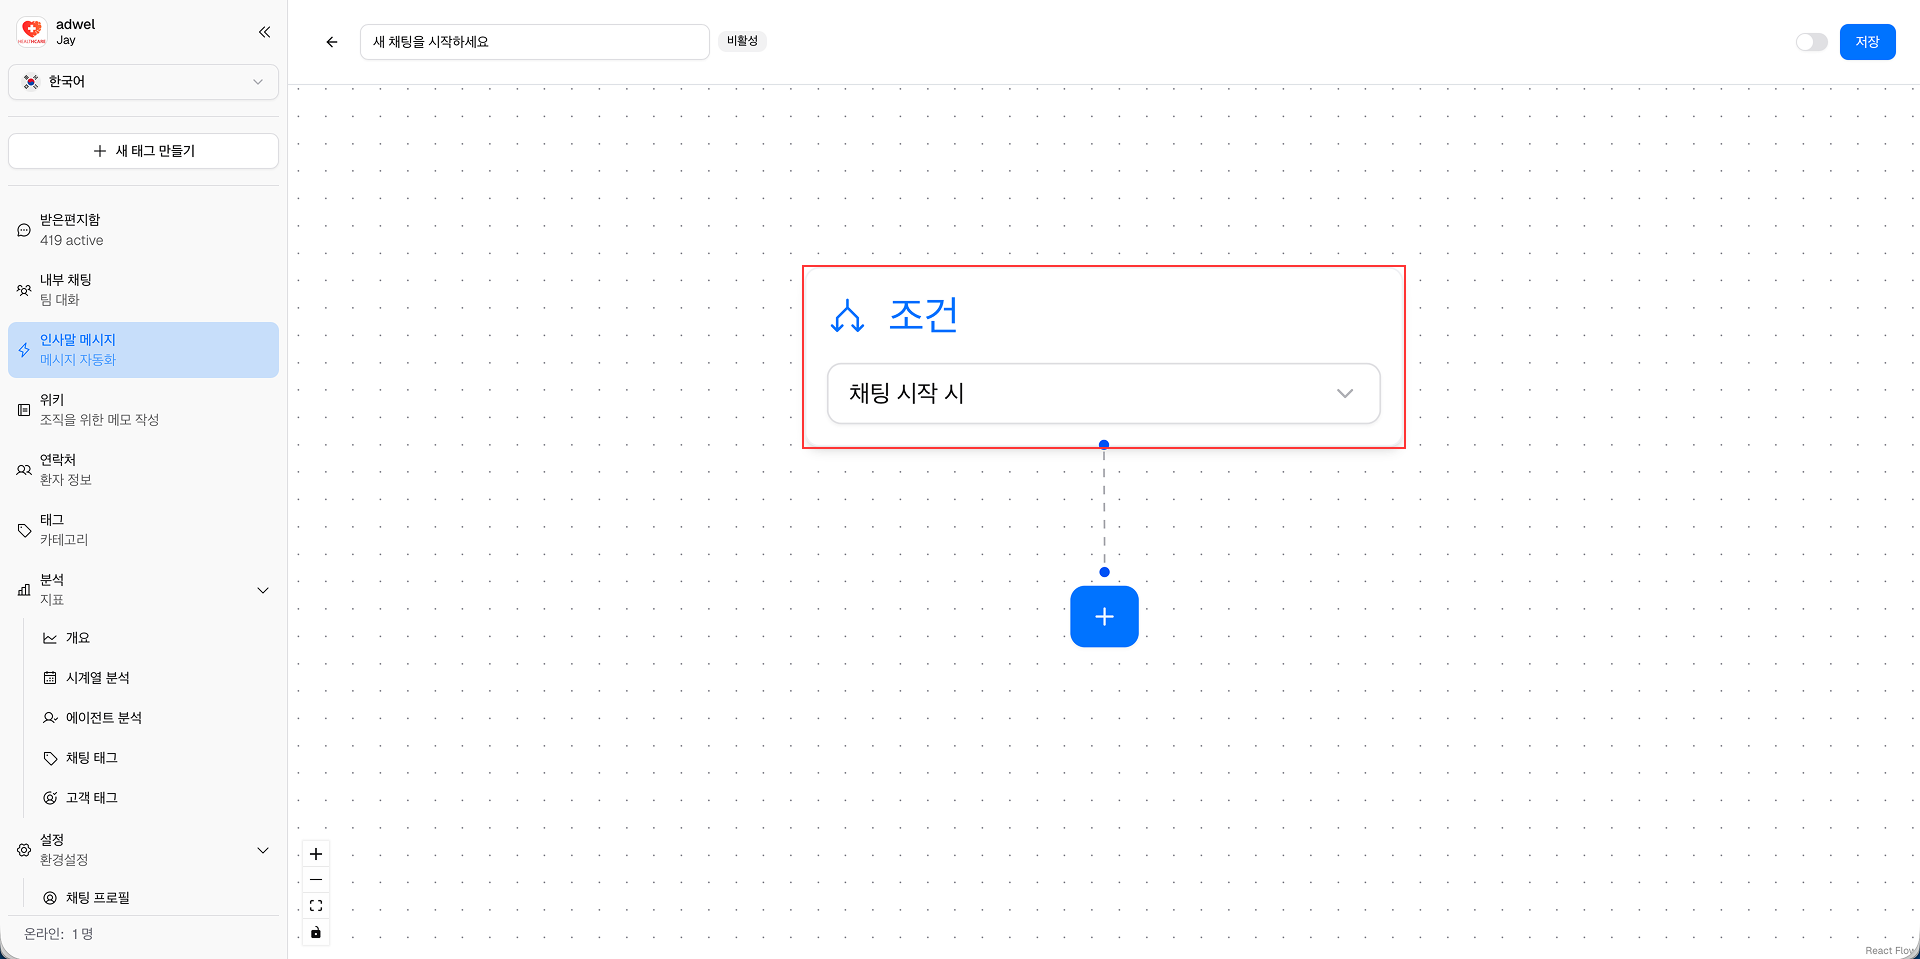
3단계: 작업 영역의 조건 구성요소에서 채팅 시작 시를 선택합니다. 그러면 환자가 채팅 세션을 시작할 때 인사말 메시지가 전송됩니다.
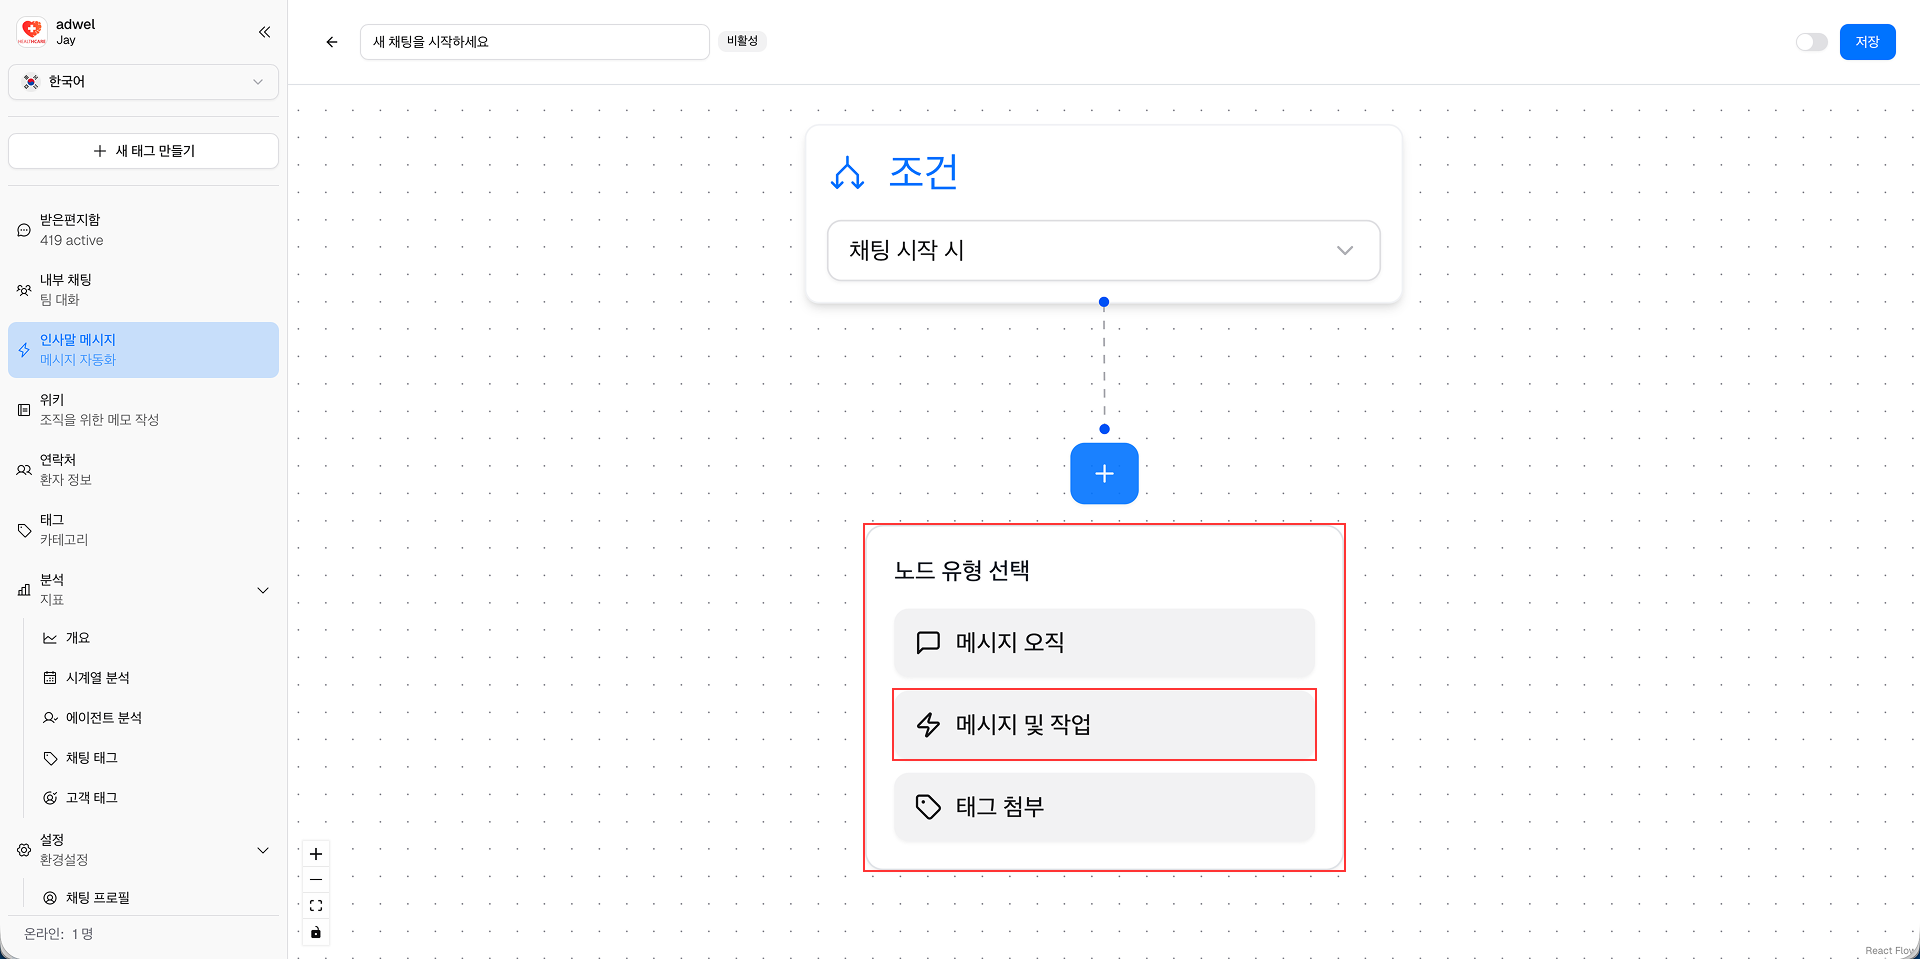
4단계: 더하기(+) 아이콘 버튼을 클릭하여 노드 구성 요소 목록을 표시합니다. 그런 다음 메시지 및 작업 구성요소를 선택합니다. 작업 영역에 Message & Actions 노드가 추가됩니다.
5단계: 새로 추가된 Message & Actions 노드에 메시지 내용을 "Hello, what can we help you?"로 입력합니다.
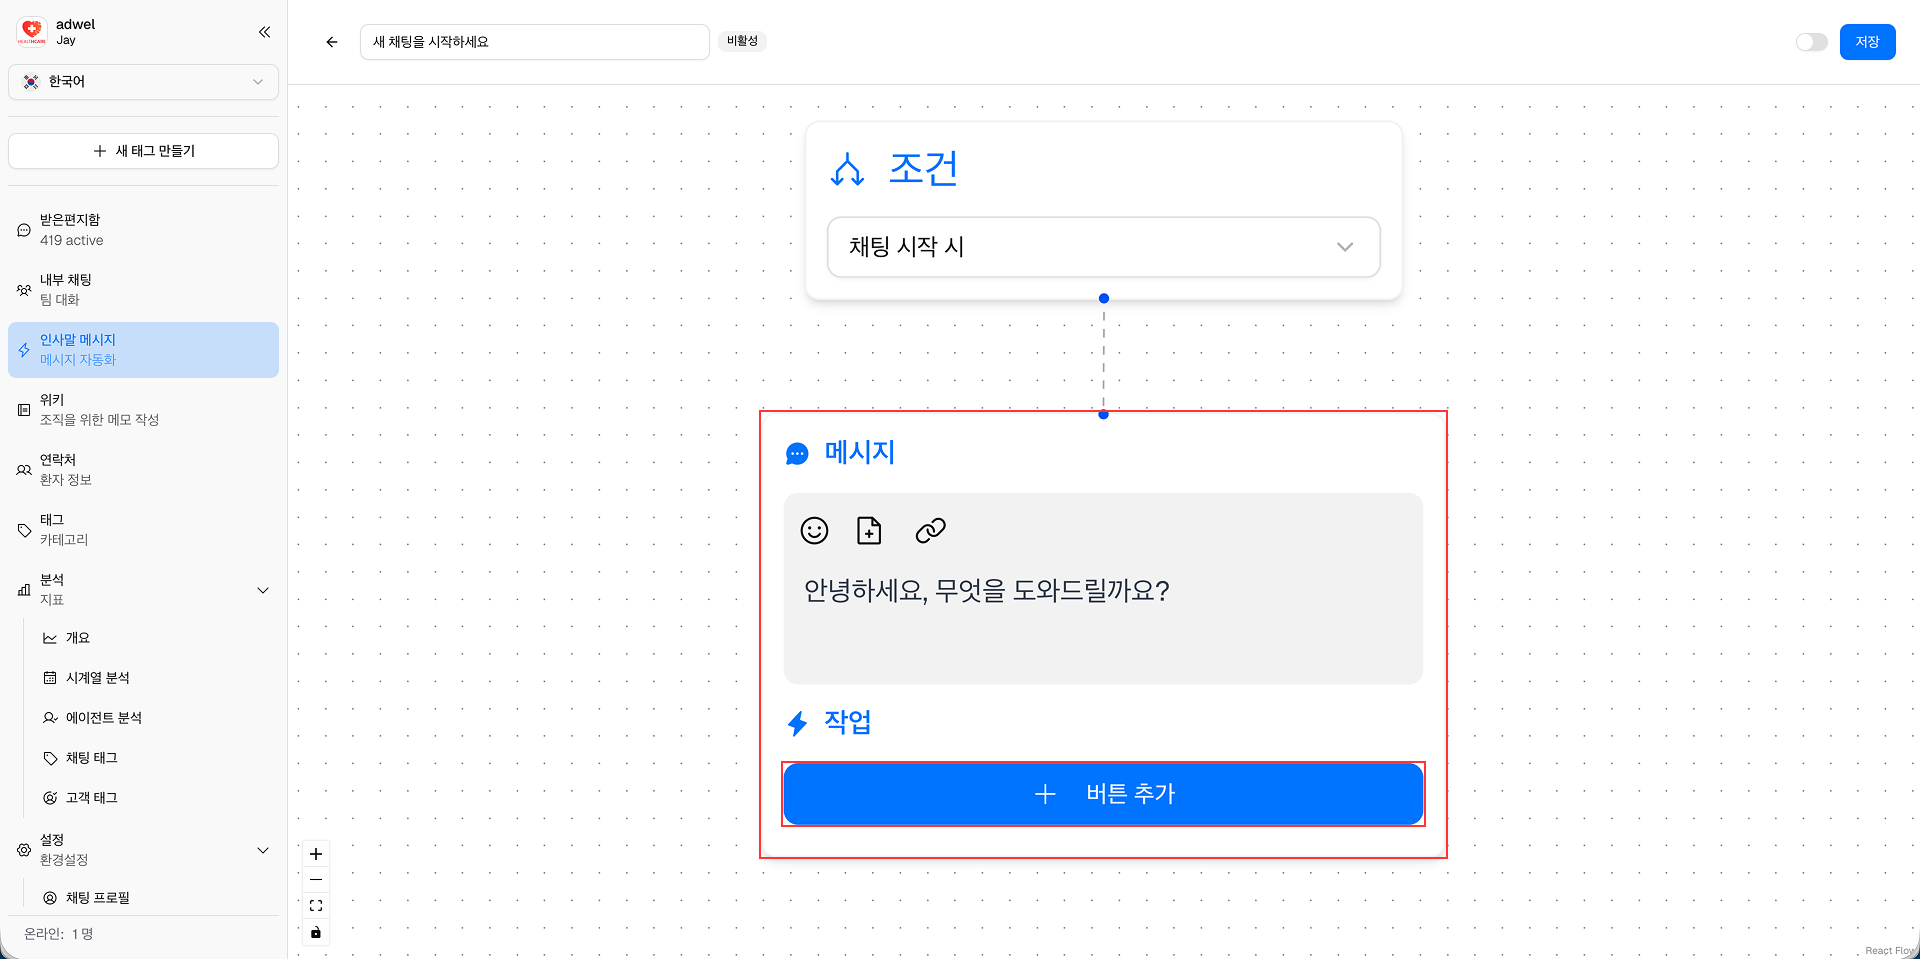
6단계: 추가 버튼을 클릭하여 첫 번째 작업을 추가합니다. 그런 다음 버튼 라벨에 "병원에 대해 질문이 있습니다"라고 입력하세요.
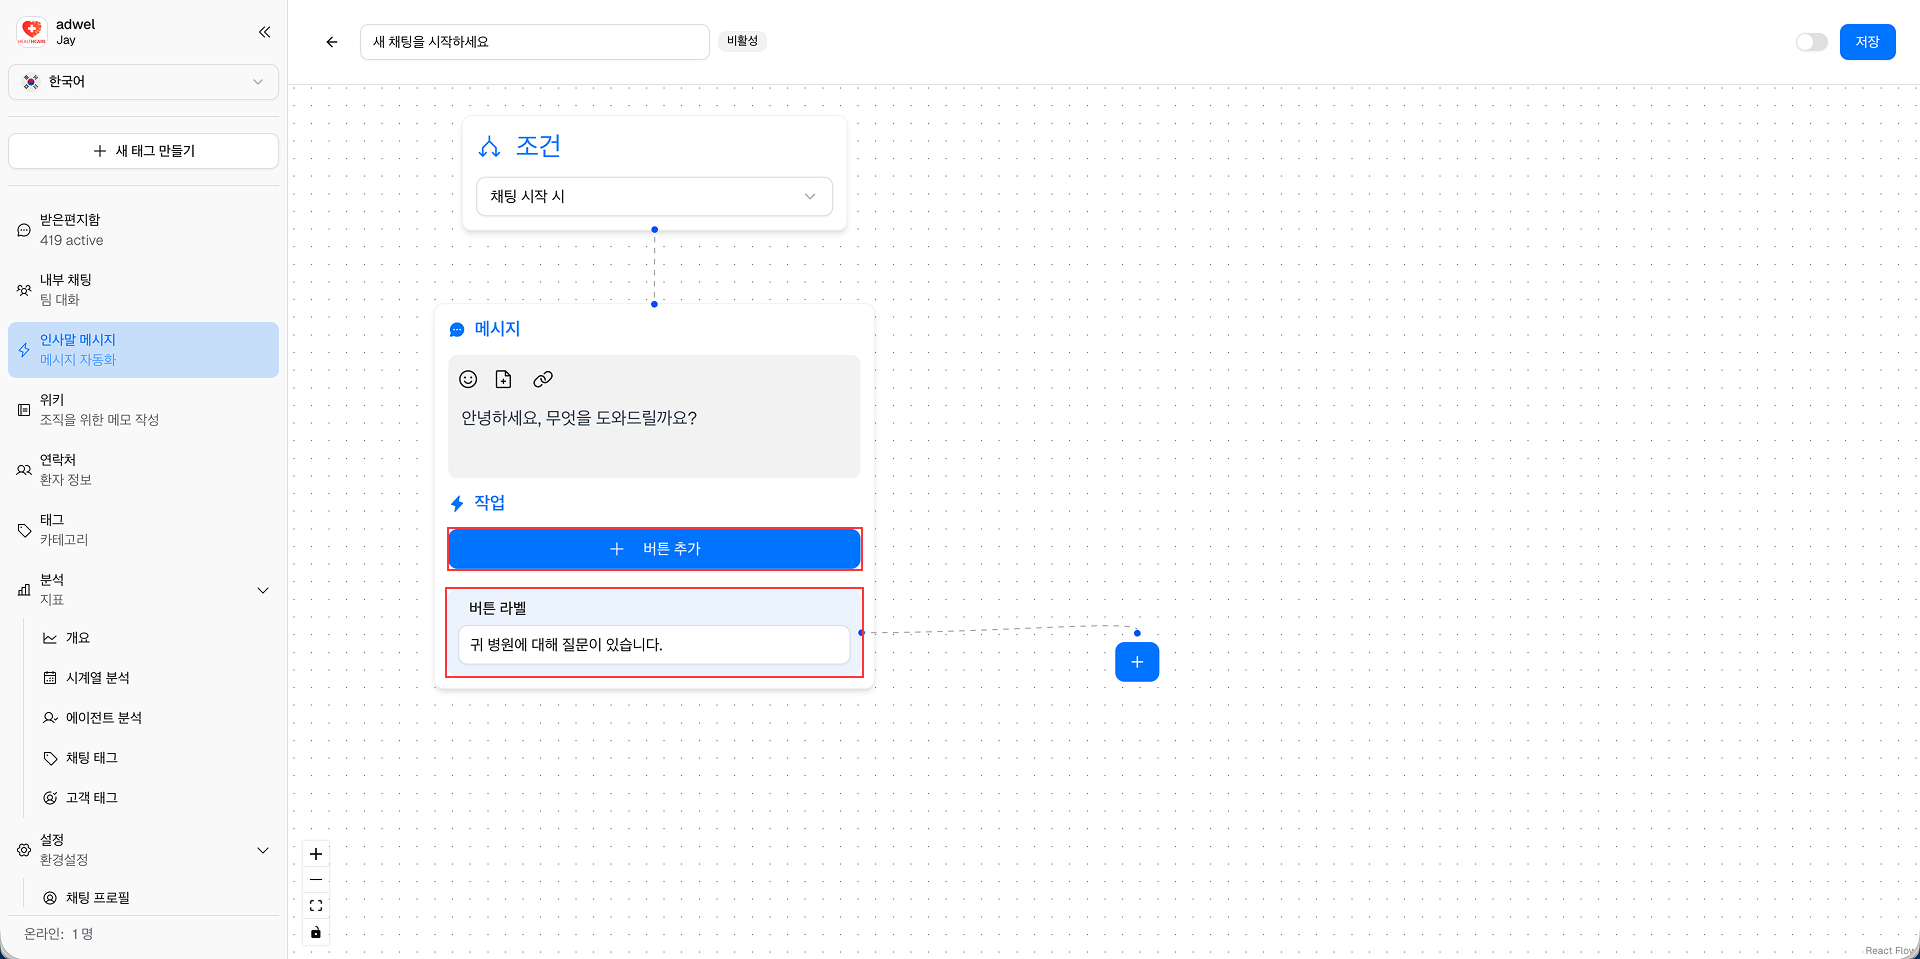
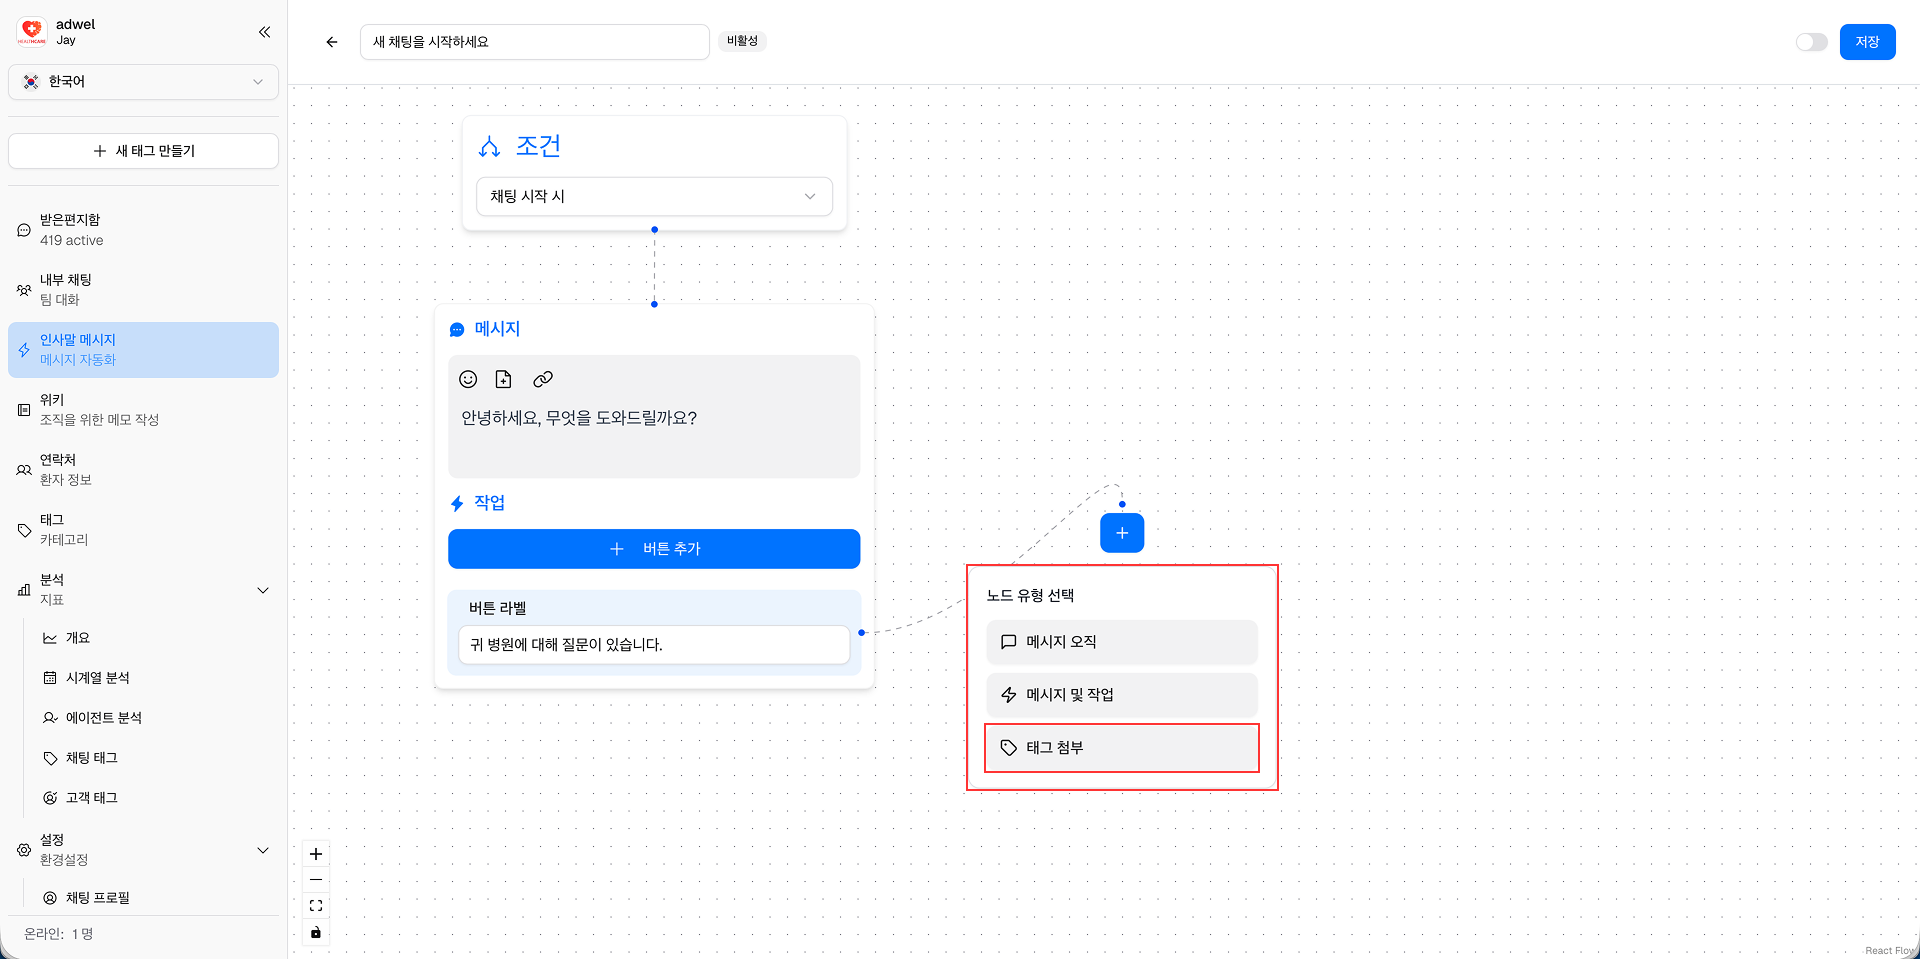
7단계: 첫 번째 작업의 더하기(+) 아이콘 버튼을 클릭하면 노드 구성 요소 목록이 표시됩니다. 그런 다음 태그 첨부 구성요소를 선택합니다. 그러면 첫 번째 작업에 태그 첨부 노드가 추가됩니다.
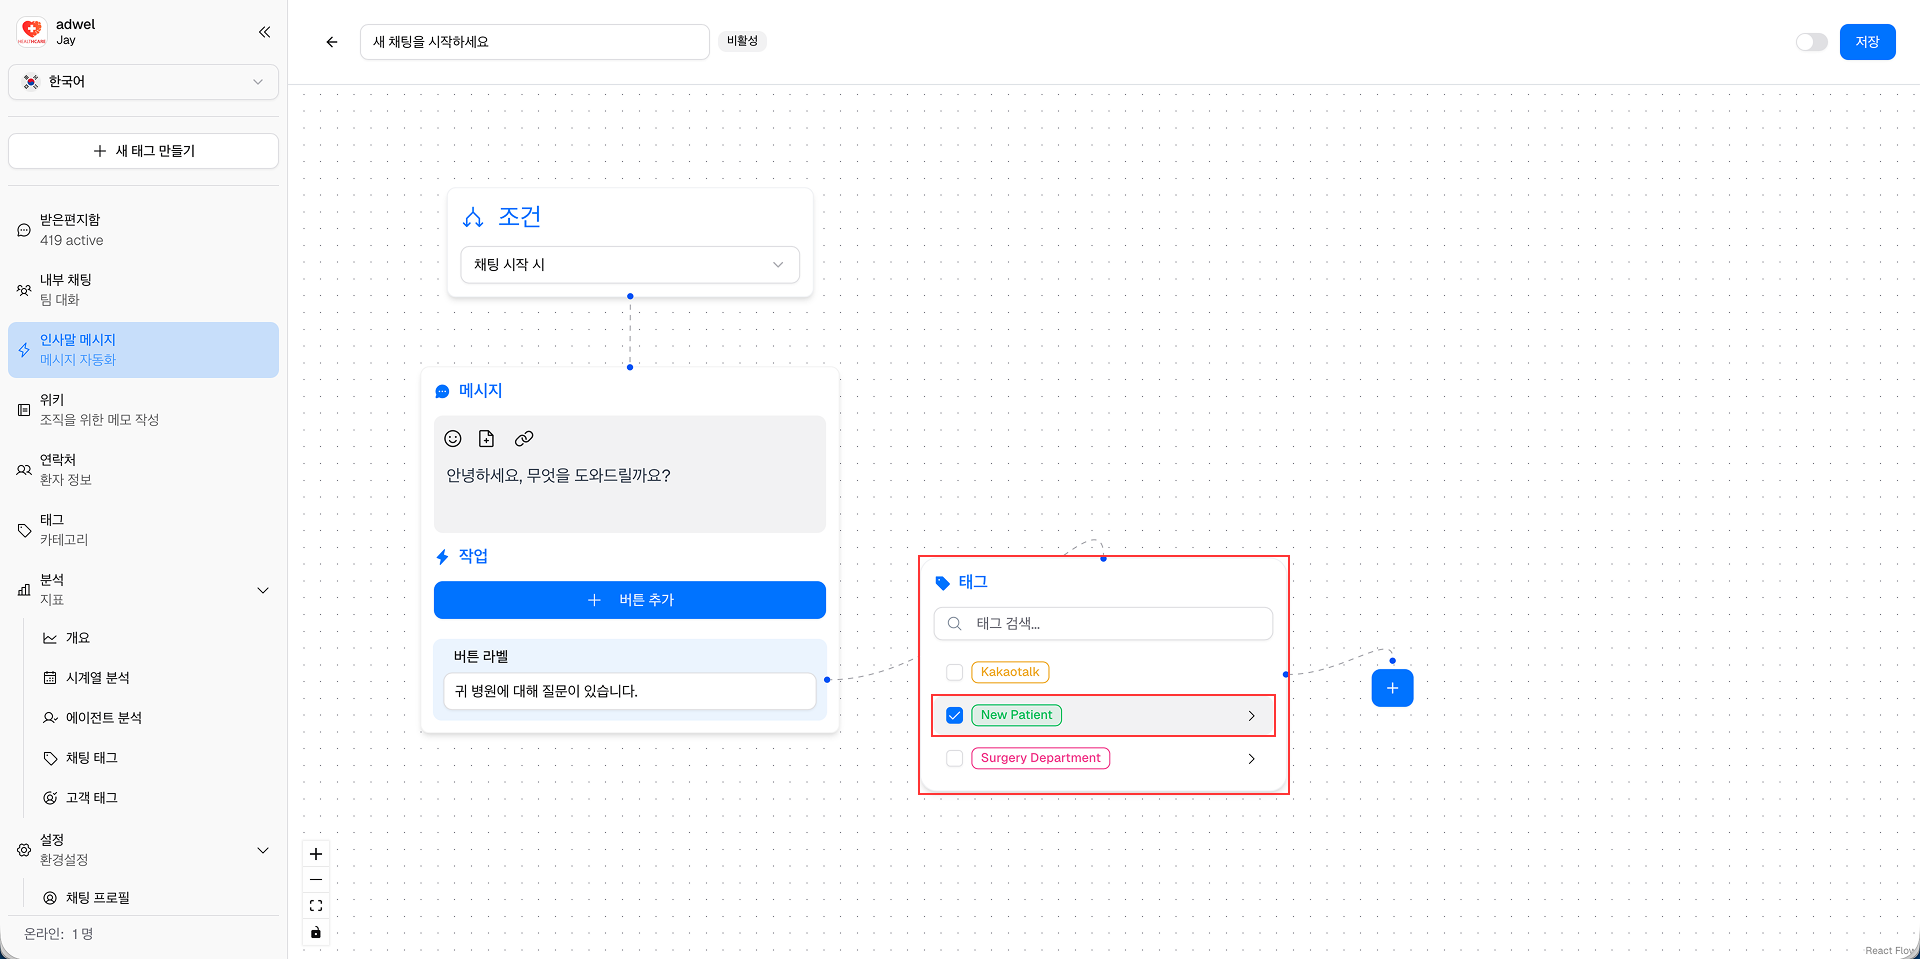
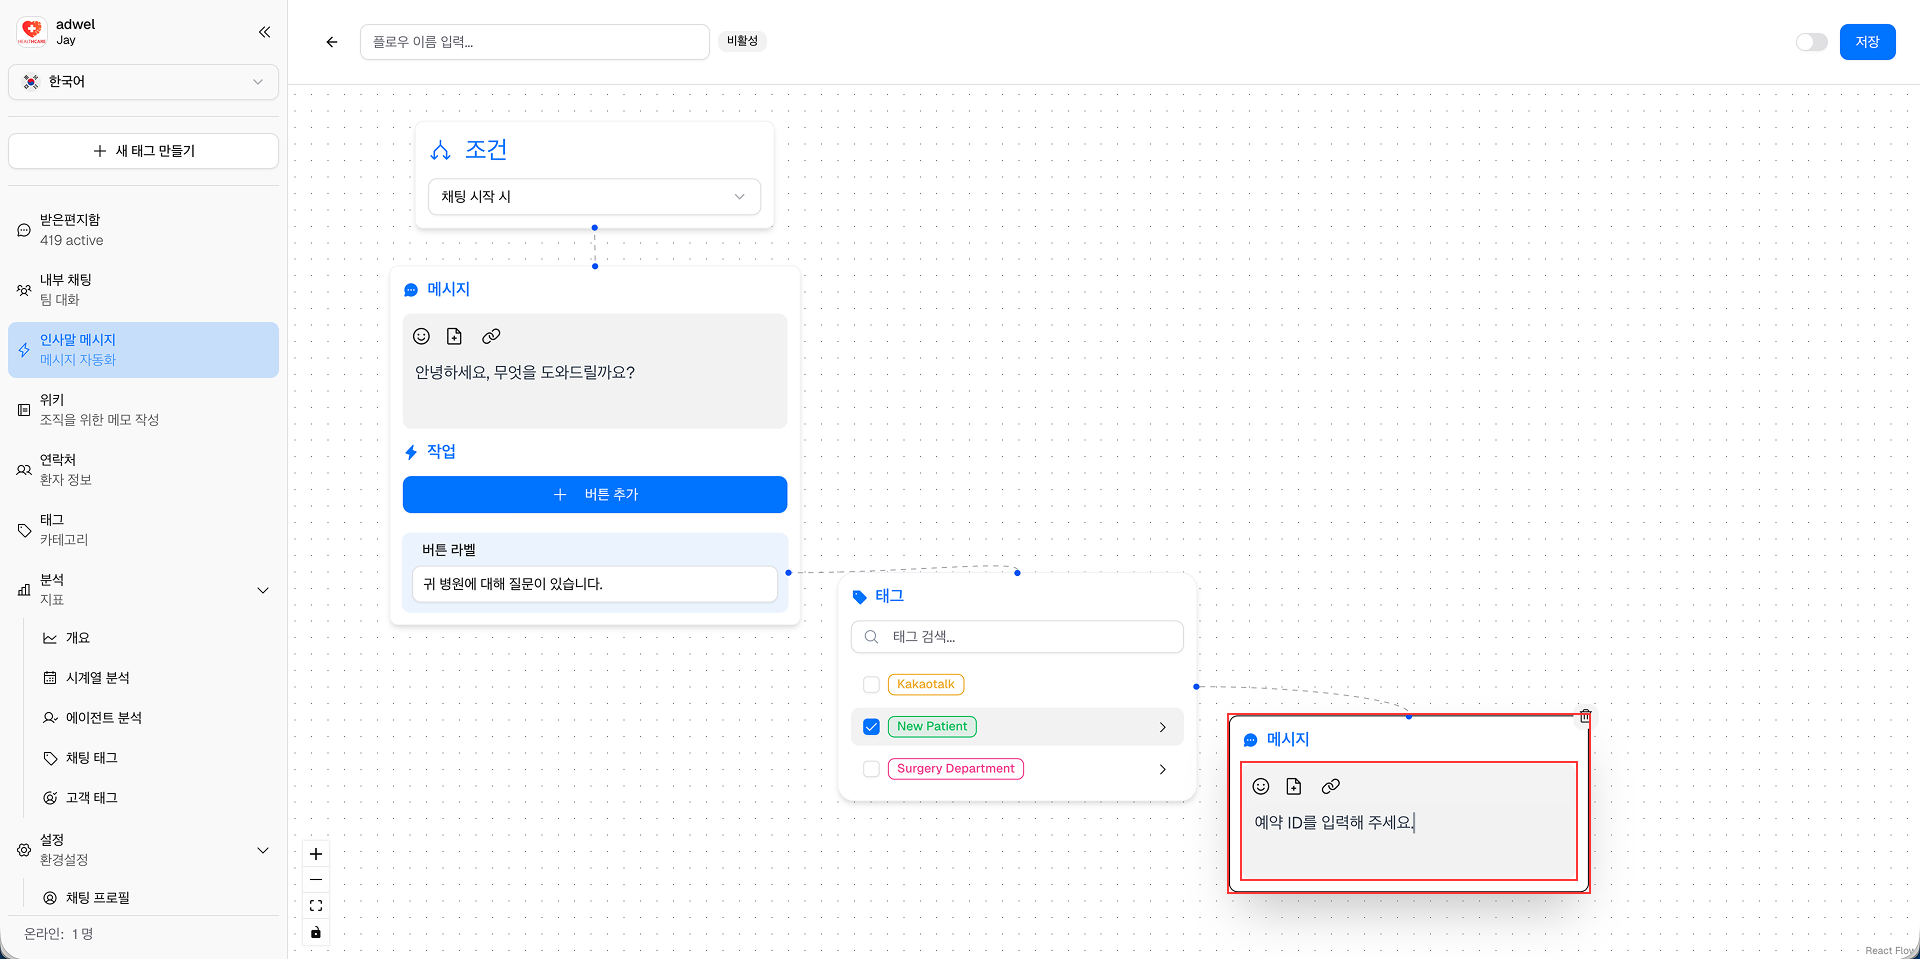
8단계: 새로 추가된 태그 첨부 노드의 태그 목록에서 "새 환자" 태그를 선택합니다(채팅 태그에서 "새 환자" 태그를 생성해야 한다는 점에 유의하세요).
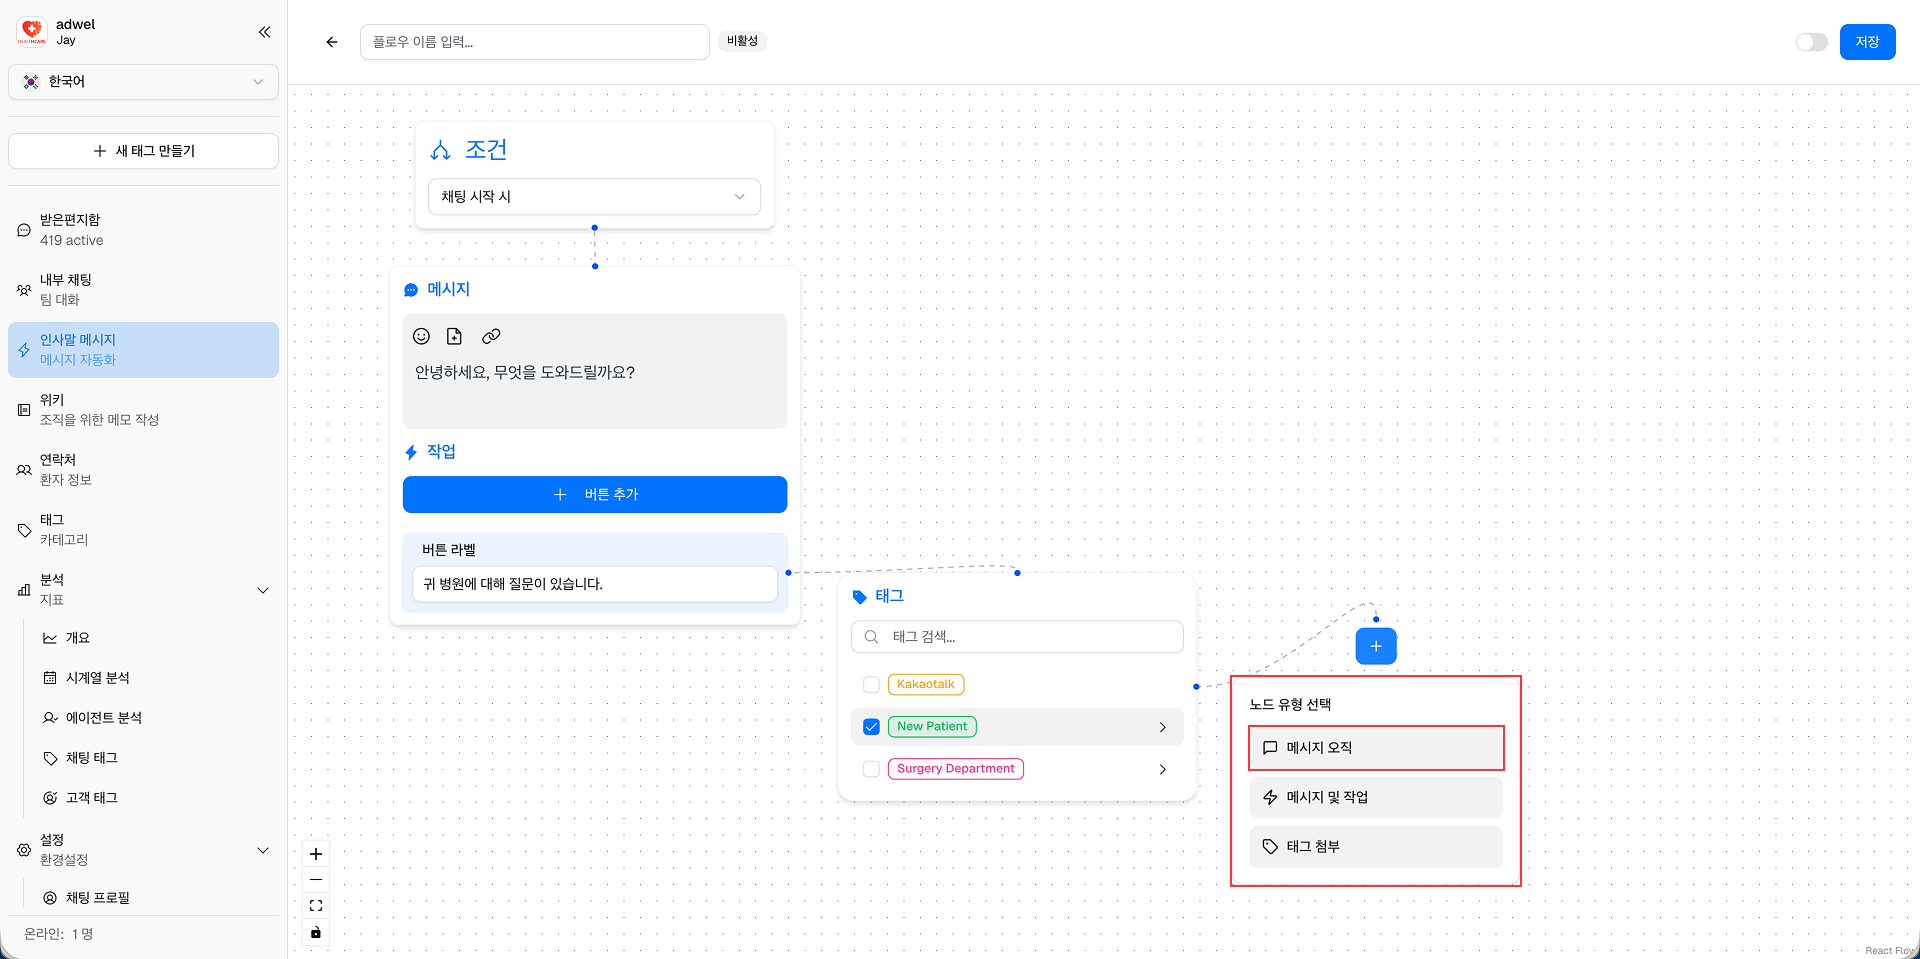
9단계: 태그 첨부의 더하기(+) 아이콘 버튼을 클릭하여 노드 구성 요소 목록을 표시합니다. 그런 다음 Message 구성 요소를 선택합니다. 그러면 태그가 할당된 후 첫 번째 작업에 Message 노드가 추가됩니다.
10단계: 새로 추가된 메시지 노드에 "예약 ID를 제공하세요."라는 메시지 내용을 입력합니다.
11단계: 이제 Message & Actions 노드로 돌아갑니다. 추가 버튼을 클릭하여 두 번째 작업을 추가합니다. 그런 다음 버튼 라벨에 "기술 지원이 필요합니다"를 입력합니다.

12단계: 두 번째 작업의 더하기(+) 아이콘 버튼을 클릭하면 노드 구성 요소 목록이 표시됩니다. 그런 다음 Message 구성 요소를 선택합니다. 그러면 두 번째 작업에 Message 노드가 추가됩니다.
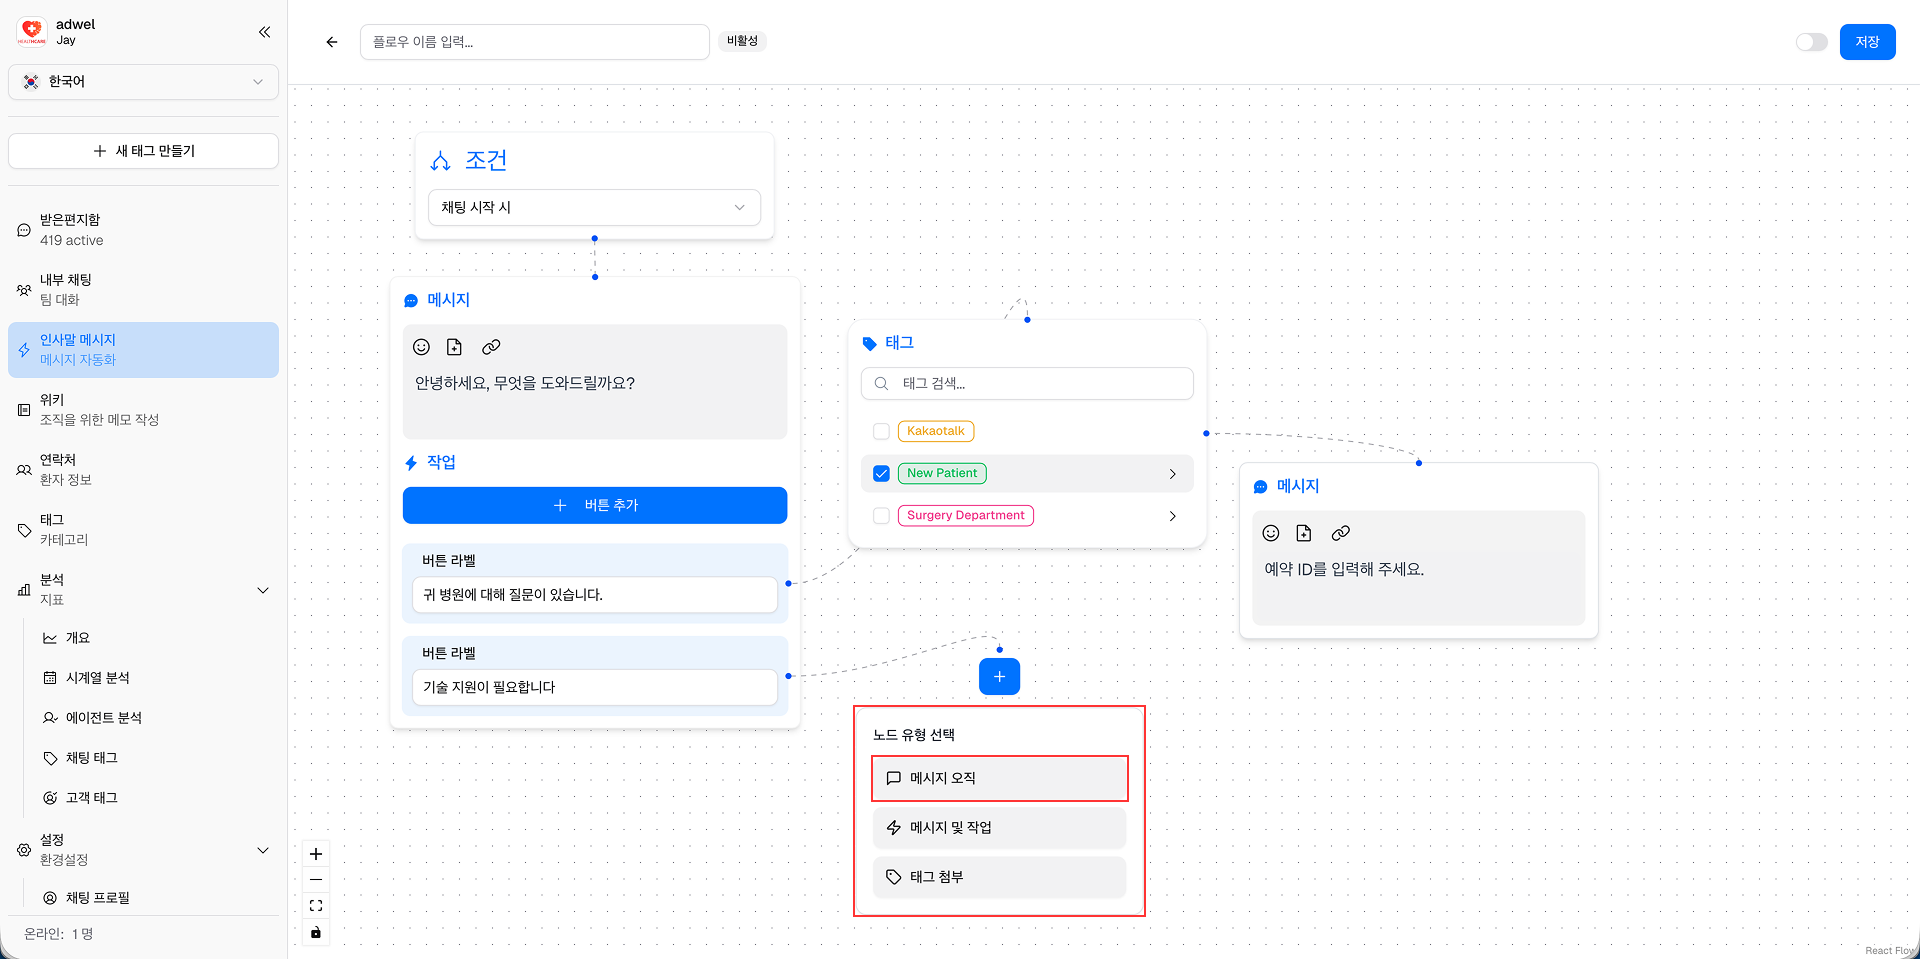
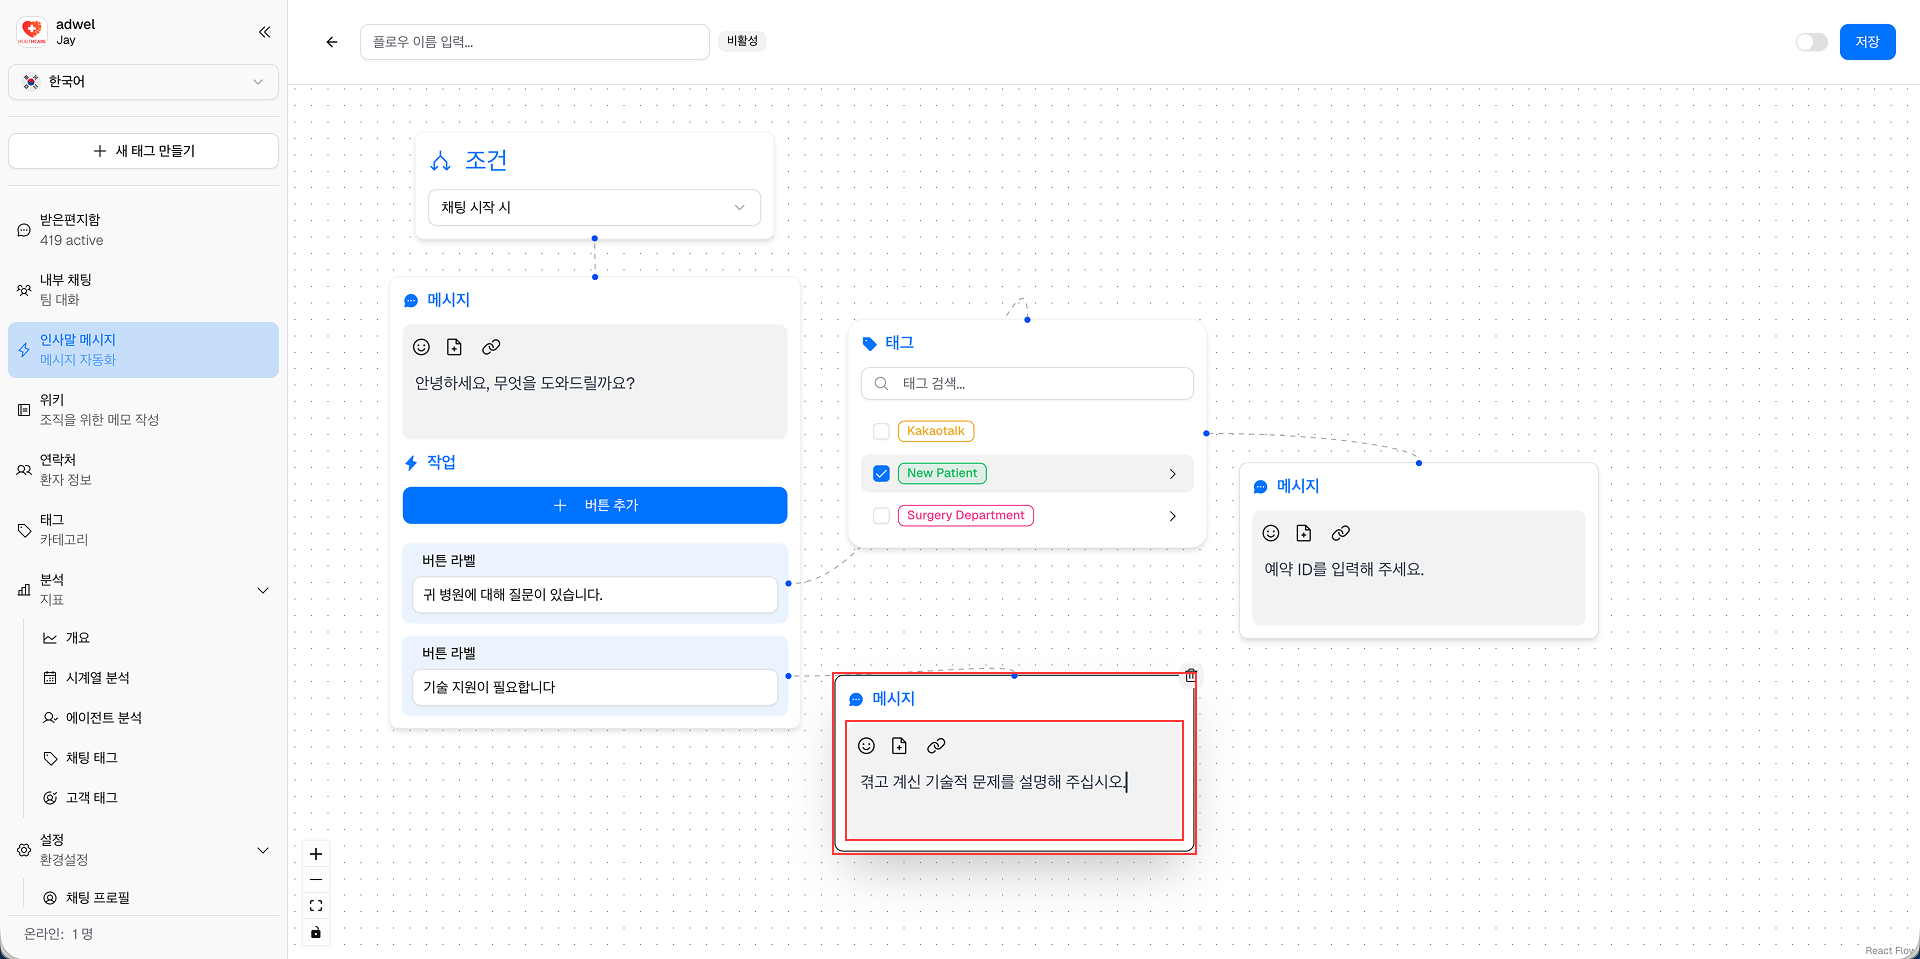
13단계: 새로 추가된 메시지 노드에 "현재 직면하고 있는 기술적 문제를 설명해주세요."라는 메시지 내용을 입력합니다.
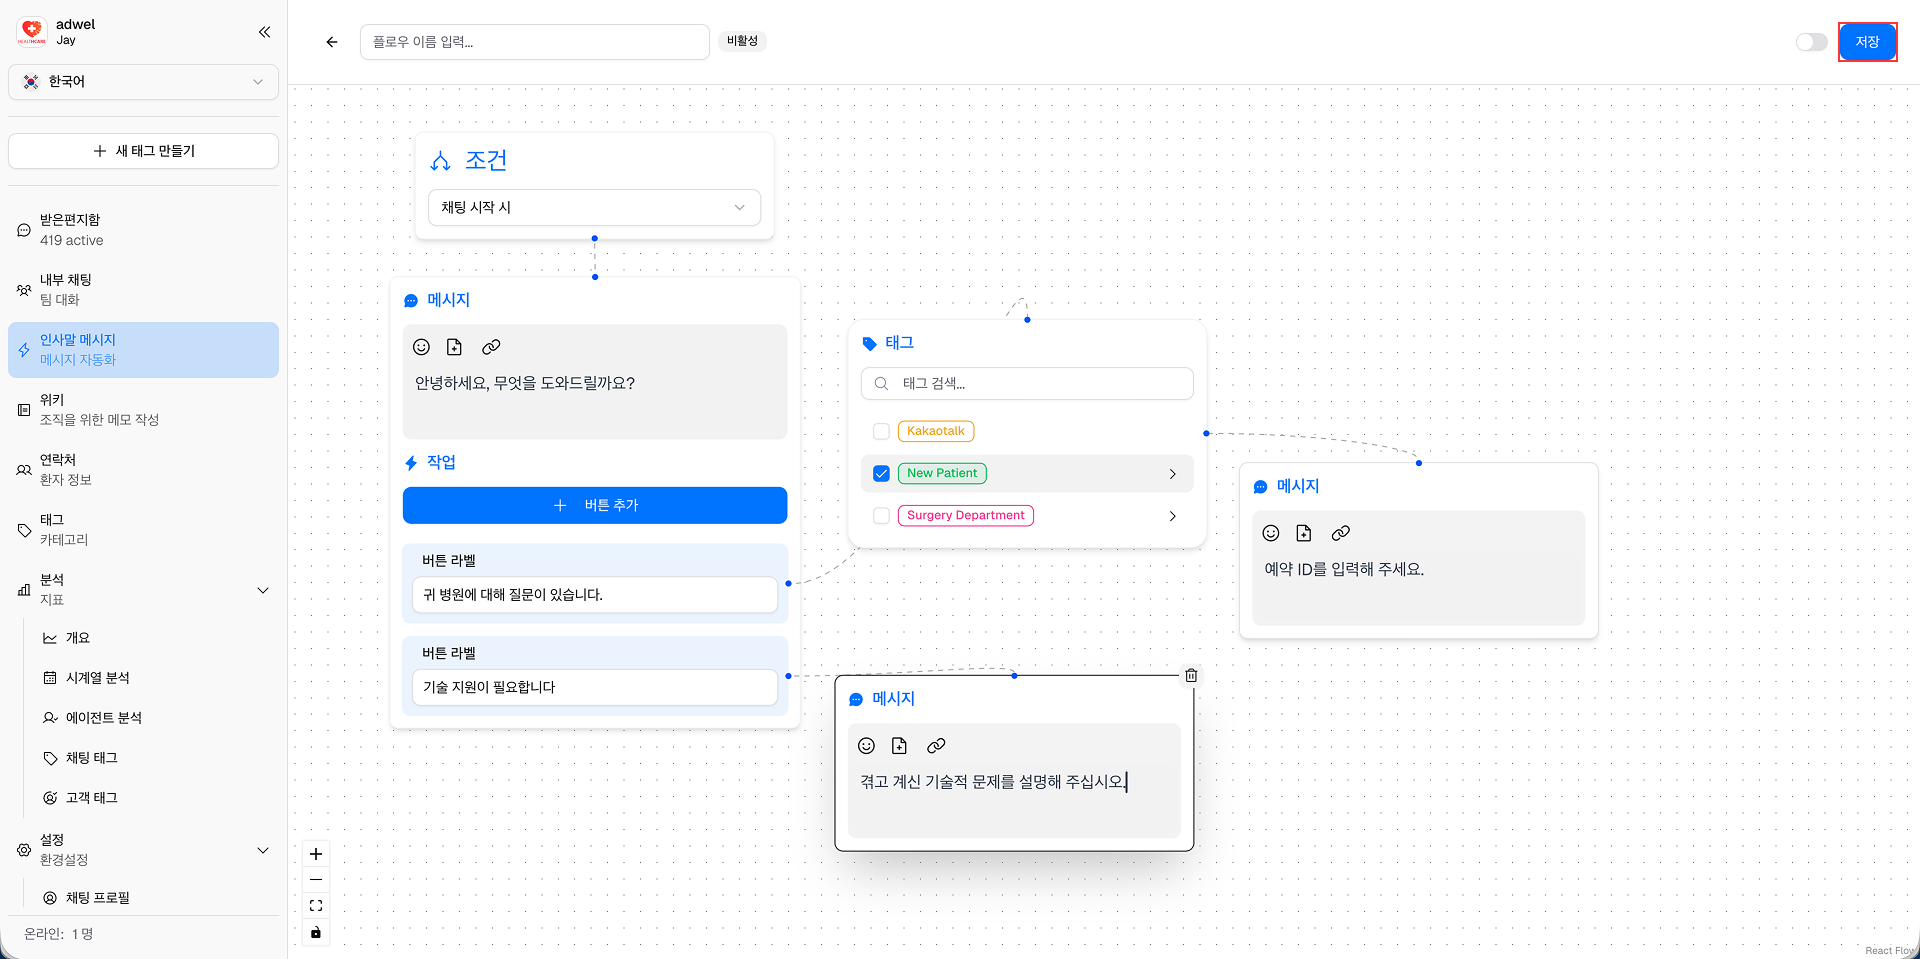
14단계: 마지막으로 오른쪽 상단에 있는 저장 버튼을 클릭하여 변경 사항을 저장합니다.
15단계: 이제 새로 생성된 인사말 메시지 "간단한 메시지"가 인사말 메시지 관리 인터페이스에 표시됩니다. 필요에 따라 상태를 전환하여 활성화할 수 있습니다. 동일한 조건의 인사말 메시지는 동시에 1개만 활성화될 수 있으니 주의하시기 바랍니다.

축하해요! 인사말 메시지 생성기 인터페이스를 사용하여 간단한 인사말 메시지를 성공적으로 만들었습니다.
결과 테스트
MChat 위젯이 통합된 병원 웹사이트나 애플리케이션에서 환자로서 채팅 세션을 시작하세요. 두 개의 작업 버튼과 함께 "안녕하세요. 무엇을 도와드릴까요?"라는 인사말 메시지가 표시됩니다.
각 작업 버튼을 클릭하면 후속 메시지와 태그 첨부 파일이 어떻게 작동하는지 확인할 수 있습니다.